Rendering lard at home kicked off when a butcher handed me a bag of pork fat scraps – why toss it when I could make something useful? I’m no chef, just a DIYer who loves tinkering with what’s on hand, and this process turned those fatty bits into a creamy cooking goldmine. It started as a quirky challenge after I got tired of buying overpriced fats – why not render my own instead? Now, it’s a staple in my kitchen – perfect for frying, baking, or even a sneaky spread on bread. My first try flopped big time – a smoky, greasy mess – but I’ve since mastered it. Here’s how I render lard at home, with all my flops thrown in for good measure!
What You Need
You don’t need much to get started – just a few basics and some grit. First, grab 2-3 lbs (0.9-1.4 kg) of pork fat – I snag mine from a butcher or farmer’s market, ideally back fat or leaf fat for the best yield. A sharp knife or meat grinder helps – I chop by hand, but grinding speeds it up. Next, you’ll need a heavy pot or slow cooker – my 4-quart (3.8-liter) cast iron pot works like a charm. Add ½ cup (4 oz/120 ml) of water to prevent scorching – I skipped this once and regretted it fast. A strainer or cheesecloth is key to filter the bits, plus a jar or two – 1-2 pints (16-32 oz/473-946 ml) hold my haul. A stove or slow cooker at 225°F (107°C) does the heat – that’s it, simple stuff for a rich fat!
How to Do It
Step 1: Prep Your Pork Fat
Start with that pork fat – 2-3 lbs (0.9-1.4 kg) is plenty for a solid batch. I hit up my local butcher; they often give scraps cheap or free. Chop it into small chunks – about ½ inch (1.3 cm) – or grind it if you’ve got a grinder. Smaller pieces melt faster – my first try with big hunks took hours and smoked out my place! Rinse it in cold water – 1 quart (1 liter) does it – to ditch blood or grit. I forgot this once and got a funky taste – not worth skipping! For more information on lard, check <u>this Wikipedia page</u>. Rendering lard at home starts with good prep – don’t rush it!
Step 2: Melt the Fat
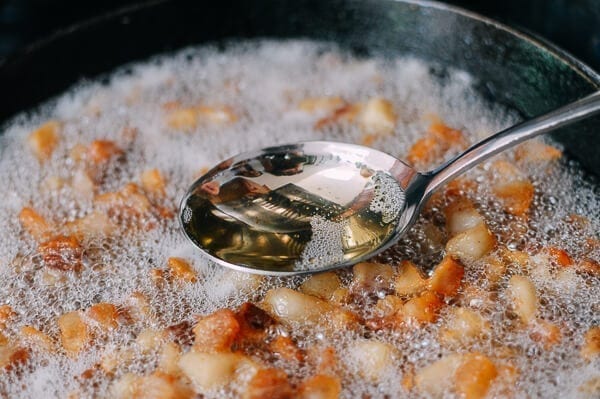
Toss your fat into the pot with ½ cup (4 oz/120 ml) of water – it stops burning at the start. Set it on low heat – 225°F (107°C) – and stir now and then. I cranked it to 350°F (177°C) once – instant smoke alarm chaos! Slow is key – it takes 2-3 hours on the stove or 6-8 in a slow cooker. The fat melts into a golden pool – I burned a batch by leaving it unattended too long. Watch it bubble – those cracklings float up when it’s close. Smell that porky goodness? You’re rendering lard at home like a pro now!

Step 3: Strain the Lard
Once it’s melted – 2-3 hours on the stove – the cracklings brown and sink. I left mine too long once – bitter bits ruined it! Strain through cheesecloth into a jar – 1-2 pints (16-32 oz/946-946 ml) is typical from 2-3 lbs (0.9-1.4 kg). I didn’t strain tight enough my first go – greasy flecks floated in my lard! Let it cool a bit – 100°F (38°C) – before jarring, or it cracks the glass – learned that the hard way too! For rendering tips, see <u>this Penn State guide on pork processing</u>. Rendering lard at home turns fat into treasure – so satisfying!
Step 4: Store and Use
Pour that warm lard into jars – it sets creamy at 70°F (21°C) in an hour. I rushed once and got a runny mess – patience pays! Store at 35-40°F (2-4°C) – lasts months in the fridge, years in the freezer. My first jar lasted six months – still perfect! Fry with it – beats oil for potatoes – or bake them crispy like <u>Growing Potatoes in a Bucket</u> deserves. Rendering lard at home keeps my kitchen stocked with versatile gold!
Tips for Variations
Want a twist? Add rosemary – 1 sprig in the last 30 minutes – for a herby kick; I tried it and loved the vibe. Or use leaf fat only – it’s milder than back fat. I mixed in bacon scraps once – smoky but greasier. Play with it – every batch teaches you something new!
Rendering lard at home is my kind of rebellion – my tiny space can’t raise pigs, but this fat fills my pantry with riches. It’s slow, yet the creamy result makes every chop worth it – no butcher shop needed, just a pot. Picture that golden jar – it’s a simple, savory win. Snag some fat and render it – you’ll cook better for it!